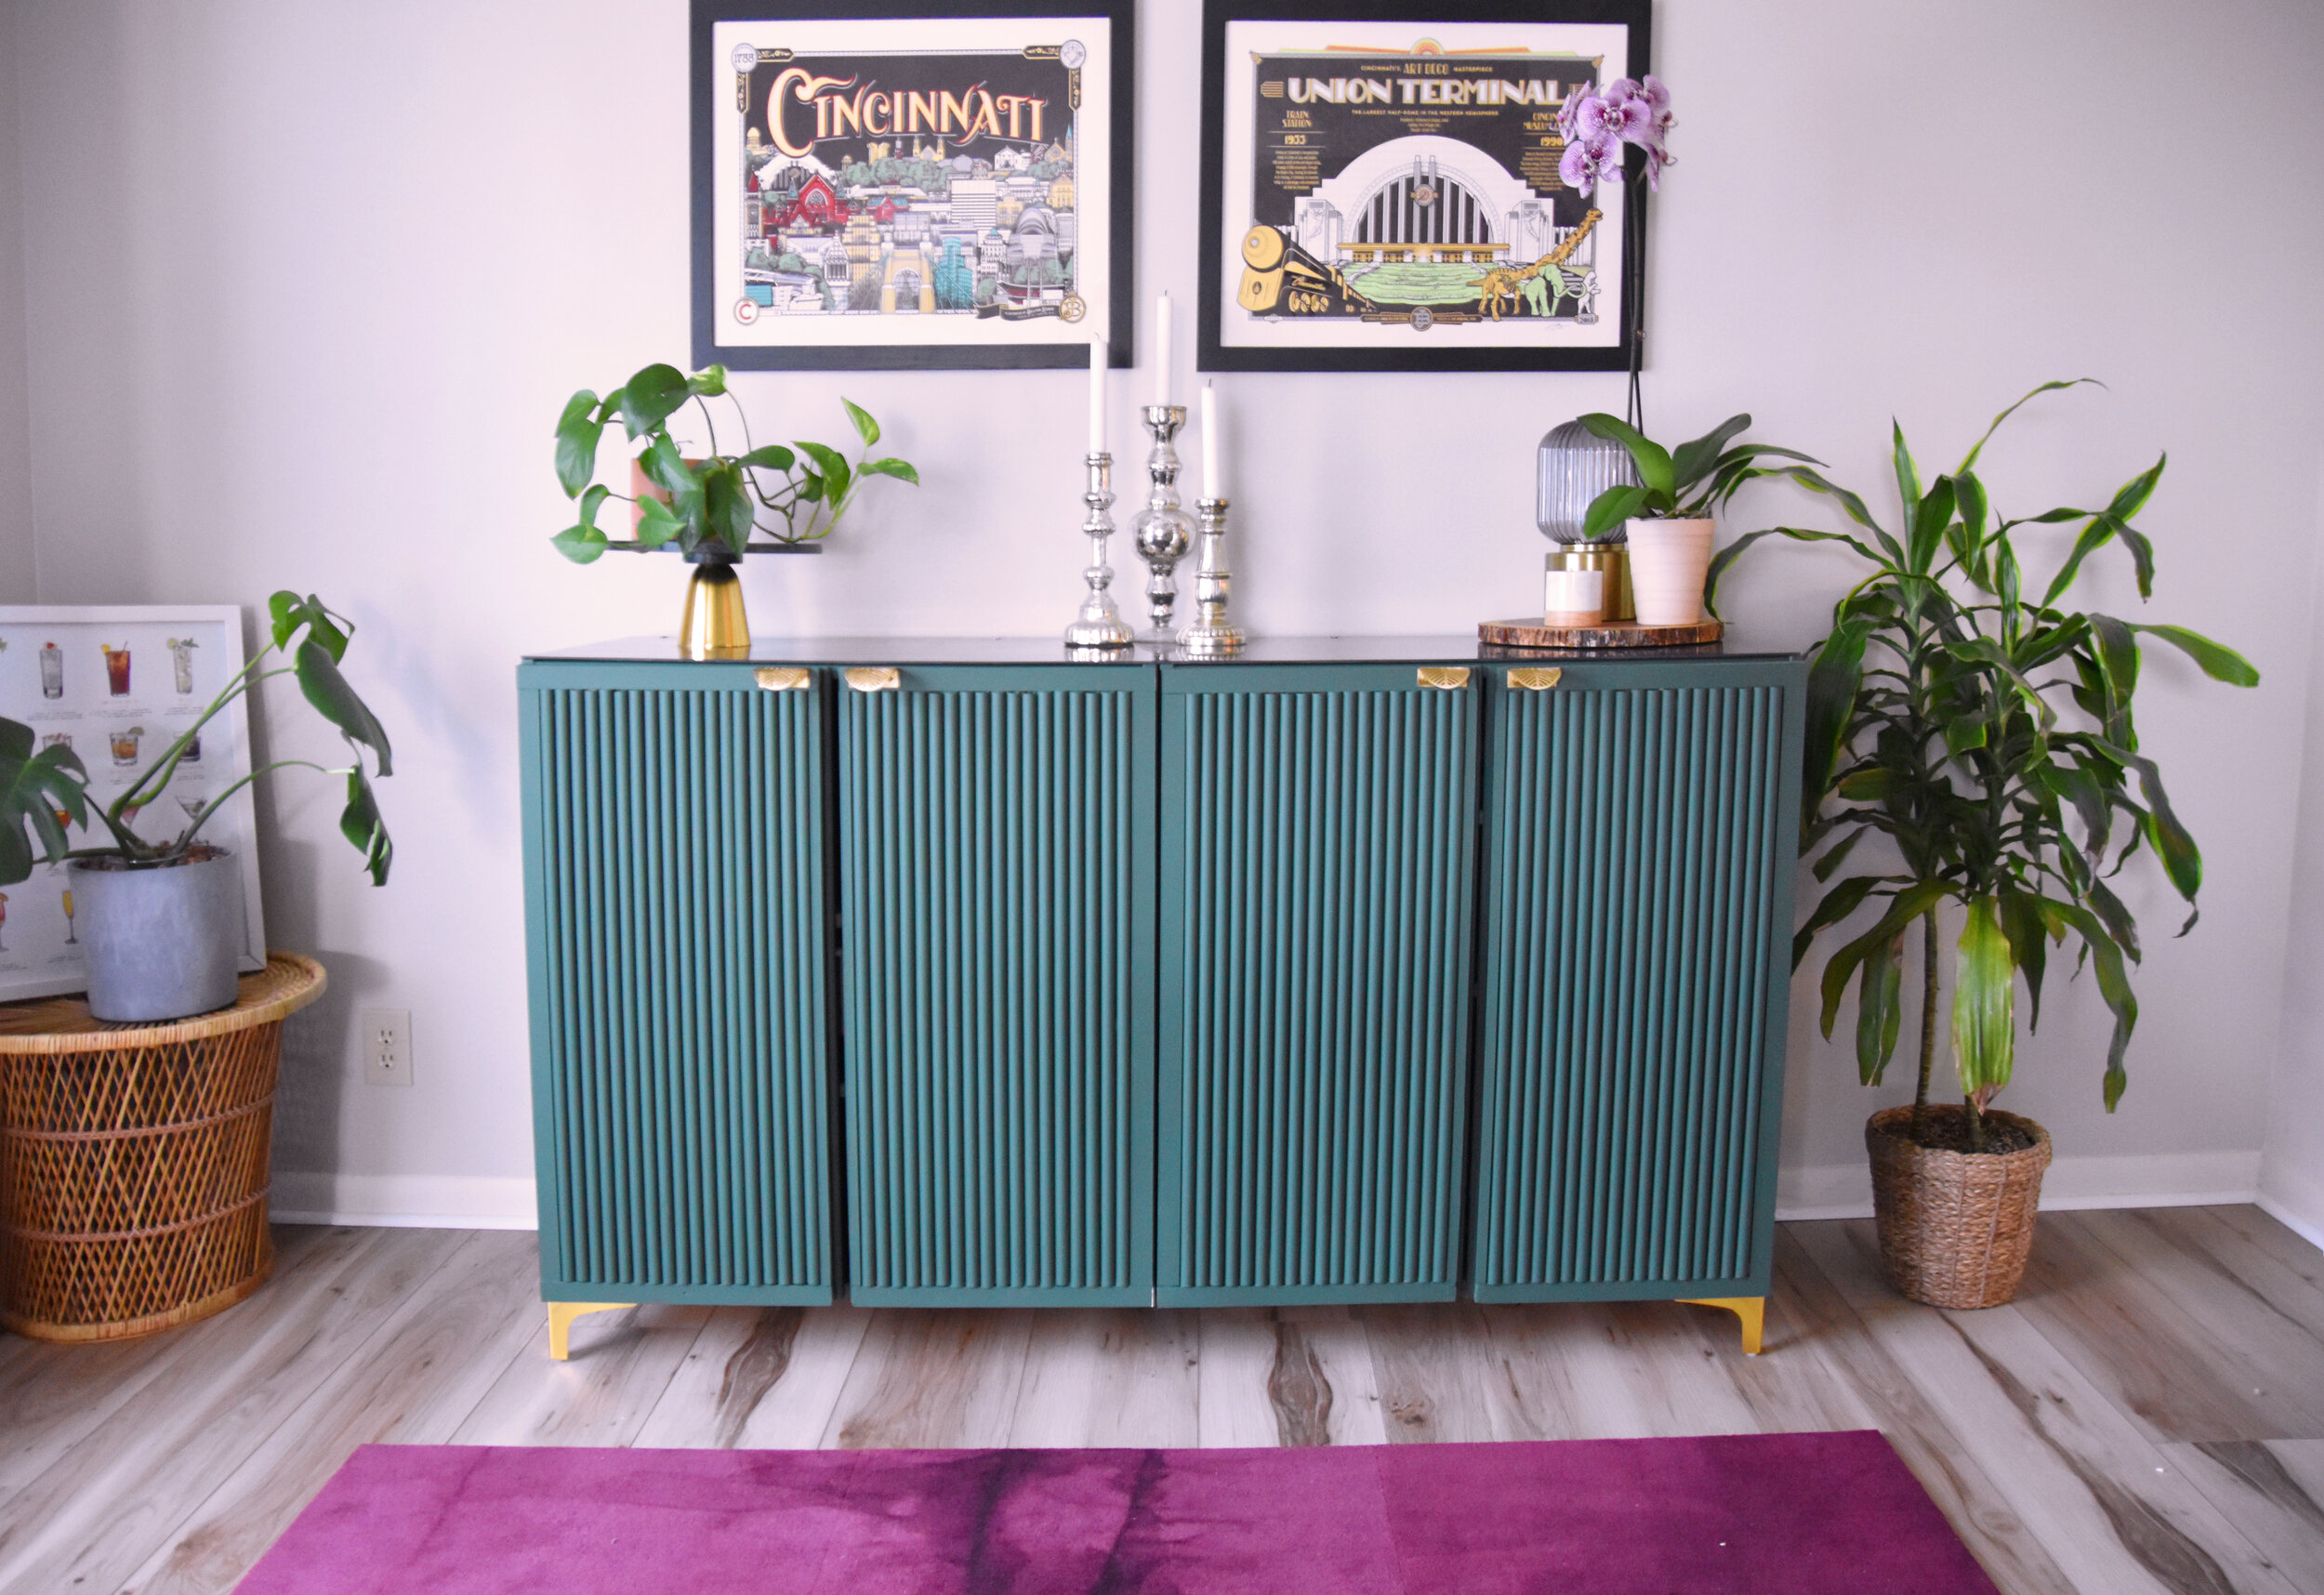
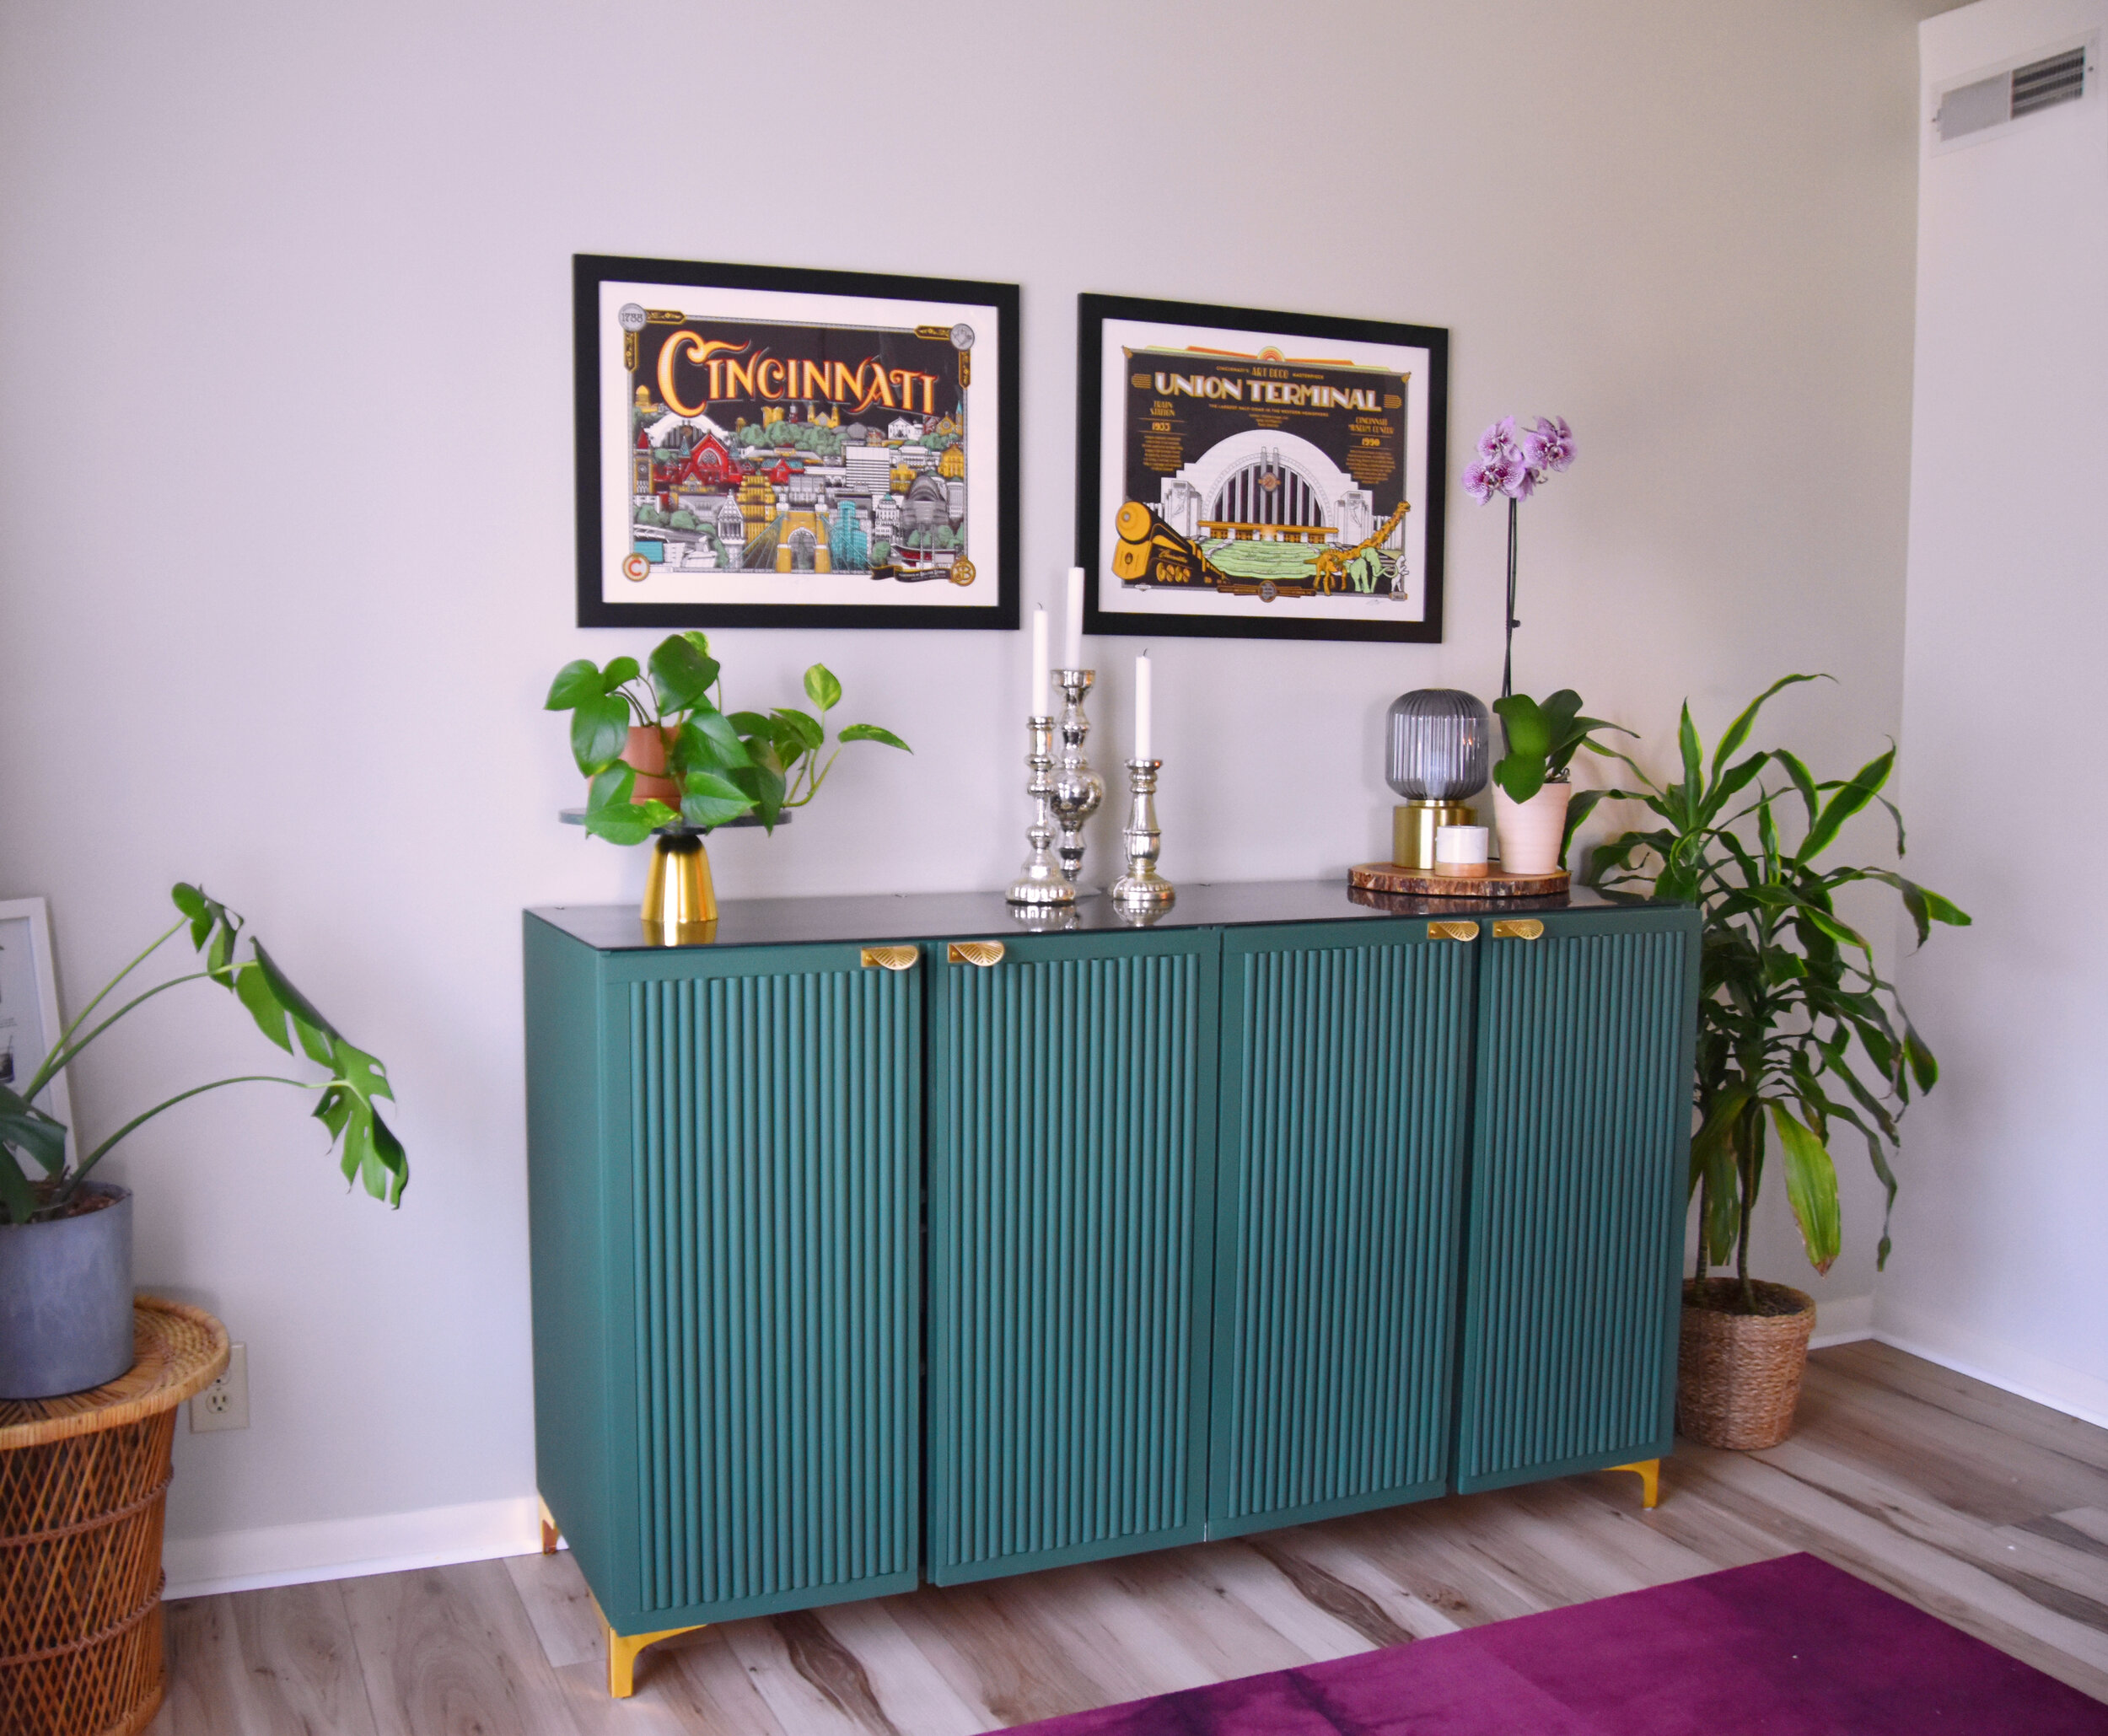
DIY Fluted IVAR sideboard
This is one of those projects that I can’t believe it took me so long to do, as in start it, and one that I loved even more when I brought it to life! I had been searching for months to find a sideboard or bar cabinet that I loved and fit within my budget. It also had to have all of the storage requirements that I wanted. It proved to be nearly impossible, when it hit me - I should just make it myself! I definitely did not rush into this process at all, I wanted it to be done thoughtfully and correct. So I got to brainstorming.
Once I decided to build it myself I went to IKEA’s website. That’s always my first place to start because they have great pieces that are often easy to customize. I landed on using IKEA Ivar because it’s a great base cabinet that allows for a world of imagination when it comes to customizing. From there I started playing with different materials and colors and textures and patterns. I have been loving the fluted pattern trend lately. The tambour look is seen on everything from wall paneling to furniture and even fluted lighting and is totally having a moment right now. There is something so timeless and sophisticated about it.
I looked at a few different colors too and thought for the longest time that I wanted to keep it neutral or stain it, before deciding NO WAY, now is the time to go BOLD with the color. I’ve been dying to use a dark green somehow, I thought maybe it’d make its way onto the walls but instead onto my cabinet instead. There are sooo many good greens out there and I loved all of the choices but some leaned more yellow, more blue and some were darker and more sage. I ended up with Behr Vine Leaf and it was the best choice!!
I always like to start out projects by modeling them out so that I can play with colors and figure out how I want to detail them before I start purchasing materials. I use SketchUp, it’s pretty intuitive and allows you to easily change details.
Here are the materials I used:
(2) IKEA IVAR cabinets, 20” depth
(1) IKEA Malm glass top, gray 63” x 18-7/8”
(1) IKEA Besta support leg, 3-7/8” H
(2) IKEA Ivar drawer, gray
(24) 3/8” D x 3/4” W x 96” L half round moulding
1/4” x 1-1/8” white primed trim wood
1/4” x 1/2” x 30” balsa wood, cut to size.
1 pack, or 4 double wide mending plates
(1) gallon of Behr Vine Green Scuff Defense Paint, Finish: Flat
Set of 4 brass handles
Set of 4 brass legs, 4” H
miter saw or hand saw and saw box (which is what I used) to cut moulding strips
drill and screwdriver
fine sandpaper
All in all, the project cost me about $500. While it might have been less expensive to purchase one out right I just knew that I wanted something that felt a bit more unique and it’s still a fraction of the cost of some of the $1000+ fluted sideboards I was looking at.
The first step was the assembly of the Ivar cabinets. I split the project into two parts and focused the first part of the assembly and painting of the main cabinets, leaving the doors as a separate section. I was so giddy seeing the green paint on the wood, it looked soooo good! The wood took the paint well and I was able to cover it in two solid coats.
Once the paint had dried I went to work on connecting the two cabinets together. I was nervous about this because there wasn’t a clear direction on how to do this so I had to get creative. Lucky for me, it turned out PERFECTLY and I was so excited! With the cabinets flipped top side down I started by using a mending plate to connect the two cabinets together. I was surprised, but delighted, that it solidly held them together. If you decide to take on this project or do something similar the next step is very important, and that’s attaching the support leg. You’ll need this between the two cabinets so that it does not sag in the middle or split apart. The even distribution of weight is so important! In terms of aesthetic, you could go two ways. Embrace it and use a brass leg to complement the other legs on the corners or go for something that kind of disappeared, and in the end I opted to have the leg not be noticeable from view. Luckily for me the IKEA Besta support leg, which is really made to go on Besta cabinets, actually worked perfectly for what I needed. It was the same height as the corner leg and had an adjustable foot to help level it out. It also functions well as another point of connection between the two cabinets.
In the third photo on the right above I have circled three other points that I used mending plates to connect the cabinets. I was having a little trouble eliminating the gap between the cabinet and keeping it level when my sister came up with the genius suggestion to flip the connected cabinets 90 degrees (like in the last photo on the right) so that the weight of the first cabinet helped keep the cabinets tight together. It also gives you space to drill the plates on. The cabinet was perfectly aligned and flush.
While the cabinet was top side down I attached the brass legs. Once the legs and connecting pieces were one that concluded the first half of the project and I put the cabinet in its place. As you can see from the photo, the support leg in the middle really disappears because of the depth of the cabinet. I love this look better because it makes the piece feel a bit more clean. Despite being much bigger, the assembly of the cabinet itself was pretty smooth to put together. The doors actually would become the most labor intensive part of the project. From making the model first in Sketchup I was able to get a good idea of the amount of wood I would need. Before cutting pieces for all of the doors I cut a few test pieces and laid them out to make sure the measurements were correct. If you have a mitre saw that would probably make the process more efficient and the cuts cleaner but I didn’t have the tools at the time so my hand saw worked pretty well. The hand saw easily cut the moulding pieces and I used sand paper to clean up the edges.
So here is where I encountered my first hiccup in the assembly process. I created the frame around the fluted pieces first and if you see from the above the photos I used the 1'-1/8” wide trim pieces all the way around the edge of the door. In the initial calculation in my 3D model it looked as though I could have the same length all the way around with 18 of the 3/4” wide half round pieces filling it out. I didn’t account for any clearance needed on the outer edges for the doors being hung so I had to rip out the inner pieces and replace them with a piece of balsa wood that was half the width, 1/2” W by 1/4” D. It leaves more of a gap in the middle, which to be honest I am not crazy about, but since I got this far in the process and didn’t want to redo a lot of my work the 1/2” W piece proved to be an efficient fix. I used a jig saw to trim the pieces and sanded them down to align with the shorter end piece. I’ll admit it’s not what I was envisioning at first but it didn’t change the aesthetic too much so I went with it. I attached all of the wood pieces using wood glue. You could use a nail gun but I found the wood glue to be really solid after it had fully cured and I’m not worried at all about pieces coming loose.
I cut and glued all of the pieces to the face of the door before painting it. Once the paint had dried I attached the brass handles and mounted them to the cabinet. IKEA gives you the pieces to do that included in the Ivar pieces. It definitely takes some messing with to get the doors to close cleaning and be level with one another.
The gray glass on the top really adds an extra level of class to the cabinet. I used the IKEA Malm glass top in dark gray. The glass piece is meant to be used with the coordinating Malm pieces but much to my delight it fit PERFECTLY over two of the 20” depth Ivar cabinets connected together. There is hardware that comes with the glass top to connect the glass to the cabinet so I feel confident that it’s safe on there. It’s so nice to have that glass top. I know it’s going to make the cabinet more durable because I don’t have to worry about the top of the cabinet’s paint chipping or staining. I think it also makes it feel more like one solid piece instead of two cabinets connected together.
One of my favorite aspects of the cabinet is all of the storage! I wanted to be able to store all of my bar items and random serving pieces. I used an IKEA wine glass rack and a bottle rack, painted to match the cabinet, to store my glasses and bottles and added 2 Ivar drawers for my bar tools and linens like placemats and napkins. I just love when things have their own place and this cabinet does exactly that! It’s all together and convenient to get to but makes the rest of my space look so tidy since I can hide it when not in use.
I can’t tell you how good it feels to have it done and in the space! It’s such a focal piece and every time I see it I can’t help but smile. It really helped give the space a design direction too. I’ve since brought in more brass and complementary jewel toned colors - like the rug! - and it makes a huge difference. Decorating the top for the seasons and for dinner parties is going to bring me such joy.
I absolutely love the fluted trend and it feels like no two projects I’ve seen around the web feel like since there is so much you can do with this aesthetic. I’d love to hear what you think! Tell me in the comments below.


